 Camera Spion in Adaptor dublu umeline AD1, Wi-Fi, Full HD, Senzor miscare
Wireless network camera procedure reference
If you use the device for the first time, power on the device and perform operations as prompted.
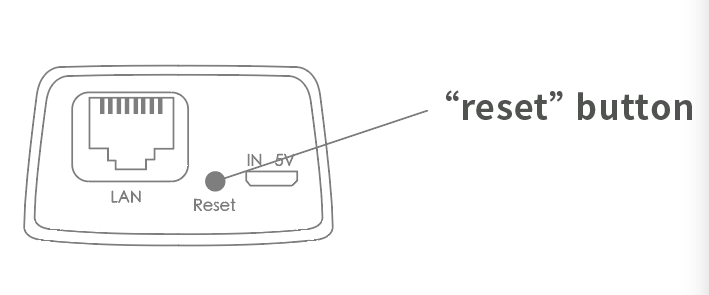
(The “Reset” button is for reference only, the actual location may vary, depending on the actual product in your hand)
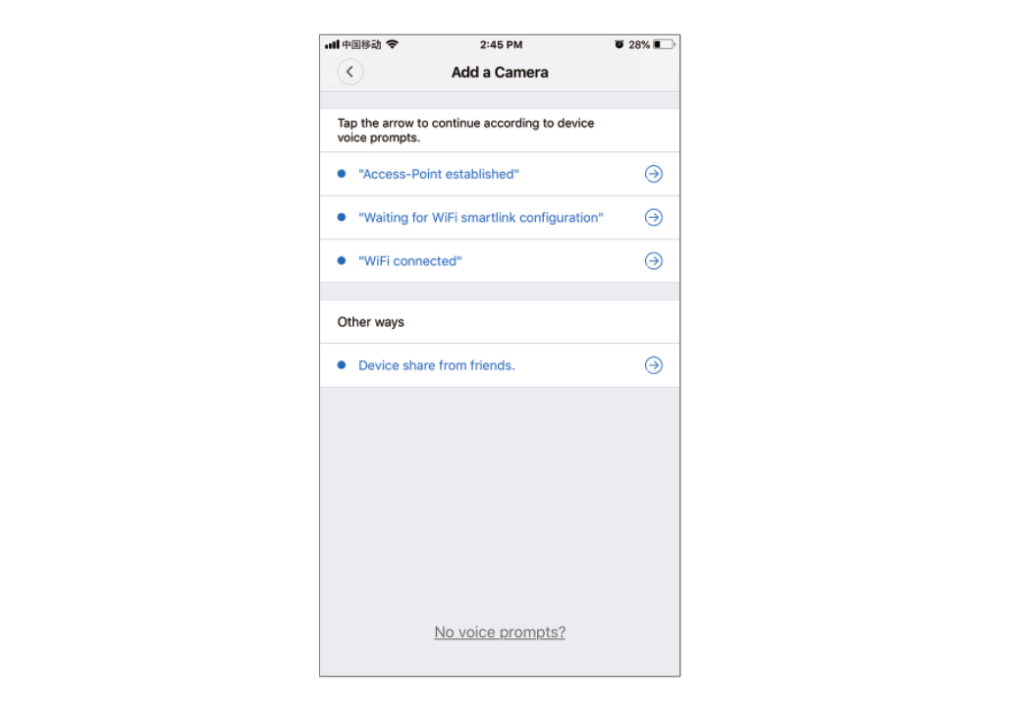
1. When you hear “Waiting for WiFi smart link configuration”, use WiFi smart link for configuration
2. If you hear the message “The access point is established,” use AP Quick configuration to configure the AP
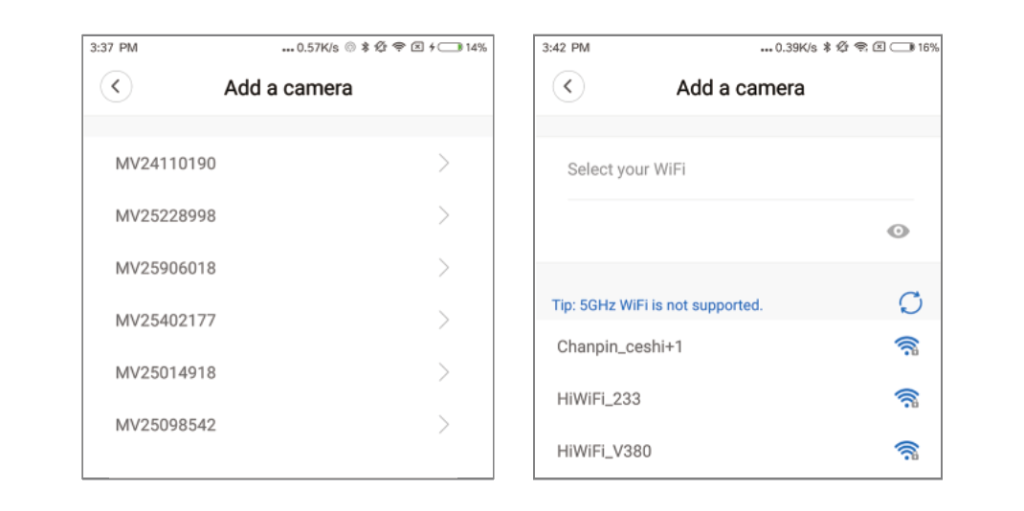
Network configuration
1. Click “+” and then “Next”.
2. Wait until you hear “Access point established” or “Wait for WiFi smartlink configuration” to start connecting the camera to Wi-Fi
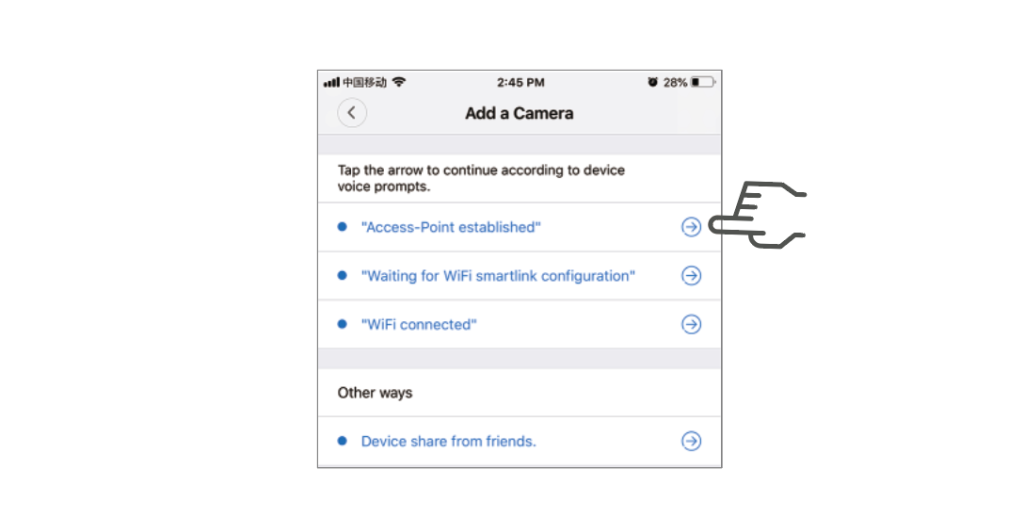
3. If the message “The Access point is Established” is heard, select Method A or B to configure the camera.
4. If you hear the message “Wait for WiFi smartlink configuration”, select Method C to configure the camera.
A.AP Quick configuration
Android:
- Click “Established access Point”, MV+ID will be displayed, click continue.
- Select your Wi-Fi network, enter your password, click “Confirm” and the camera will start connecting to Wi-Fi.
- Once you hear the camera voice prompt “WiFi is connected,” it will be displayed in the list of devices.
- The last step in setting up the camera is to set a password for the camera.
Ios:
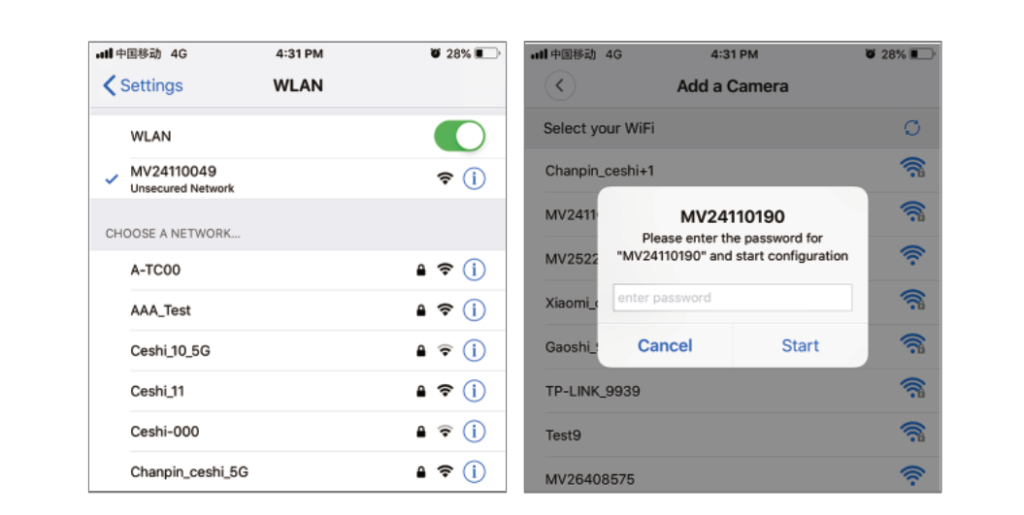
- Tap “Established Access Point”, enter the phone Settings, tap “Wi-Fi” and connect to “MV+ID”
- Wait for the “wifi” icon to appear in the status bar, then return to the App and tap “Next.”
- Select your Wi-Fi network, enter your password, click “Confirm” and the camera will start connecting to Wi-Fi.
- Once you hear the camera voice prompt “WiFi is connected,” it will be displayed in the list of devices.
- The last step in setting up the camera is to set a password for the camera.
B.AP Hotspot configuration
- Go to your phone’s Settings, tap on “Wi-Fi” and connect to “MV+ID.”
- Wait for the status bar to display the “wifi” icon, then return to the App, drop down the device list, and the device will be displayed in the list.
- Now you can already watch live on the LAN, but in order to enable remote viewing, you need to perform the following steps:
- Click “Settings” – “Network” – “Change to Wi-Fi base Station mode”, then select your Wi-Fi network, enter your password, click “Confirm” and the camera will start connecting to Wi-Fi.
- Once you hear the camera voice prompt “WiFi is connected,” the camera is ready to use.
C.wi-fi Smart link configuration
- Click “Wait for WiFi smartlink configuration”, enter your Wi-Fi password, or camera ID, and click “Next”.
- Once you hear the camera voice prompt “WiFi is connected,” it will be displayed in the list of devices.
- The last step in setting up the camera is to set a password for the camera.
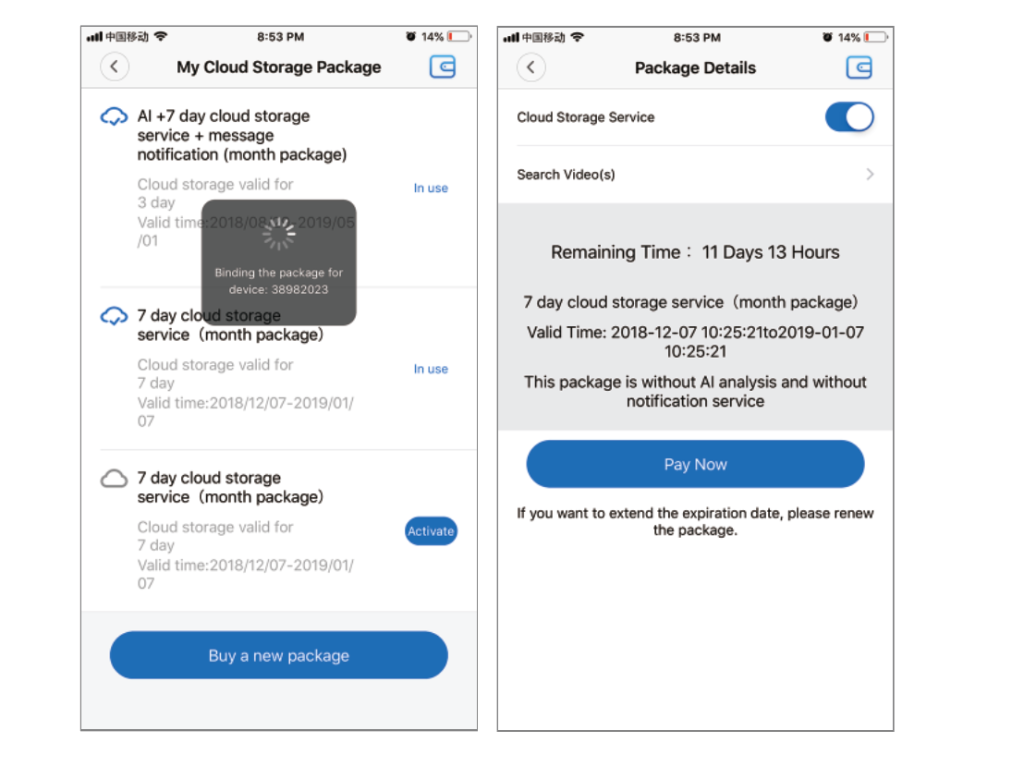
Cloud storage
When the camera captures a moving object, an alarm will be triggered and the alarm video will be uploaded to the cloud, allowing users to access the cloud footage even if the device or SD card is stolen.
Purchase package
1. Click the cloud icon.
2. Click “Buy New Package”.
3. Click “Subscribe” to order the package.
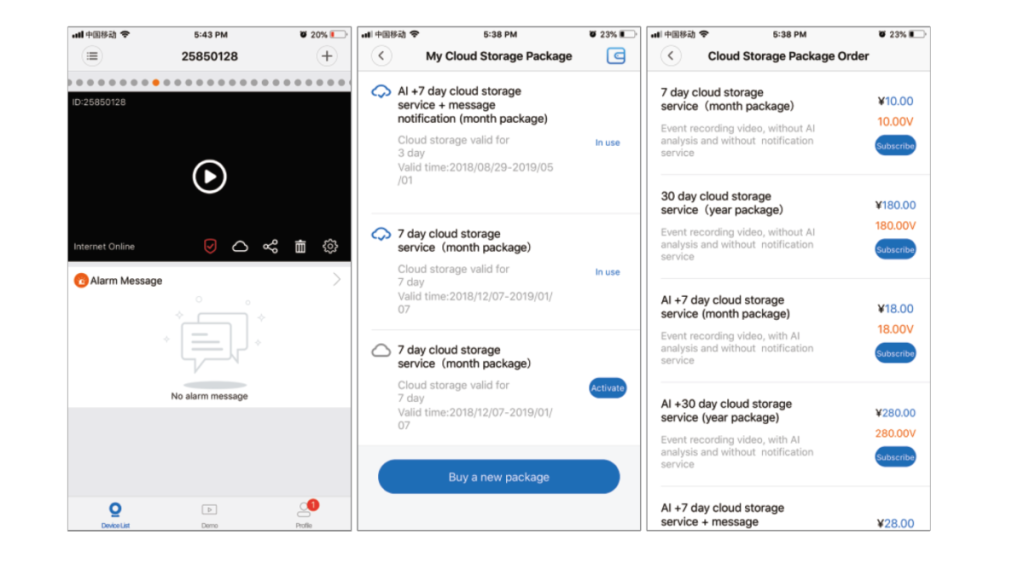
Activation pack
Click “Activate” to activate the cloud service.
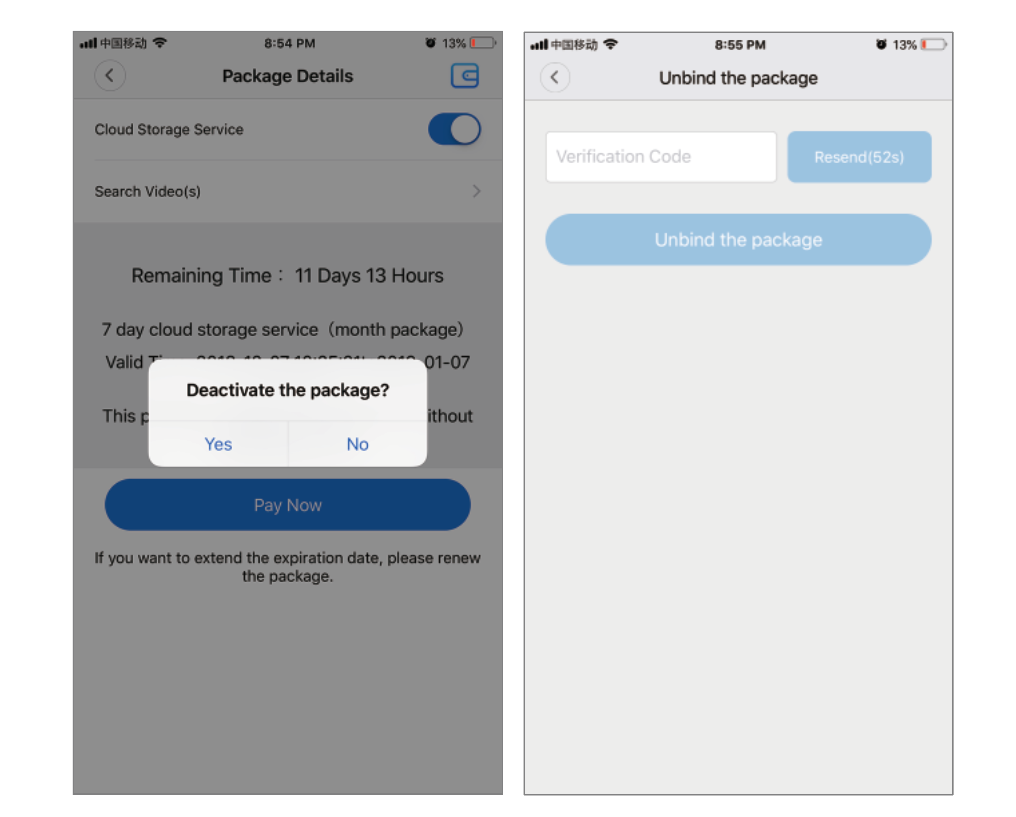
Deactivate the package
1. Disable Cloud Storage Service.
2. Click “Verification Code”, the verification code will be sent to the mobile phone or email you used when registering the App account.
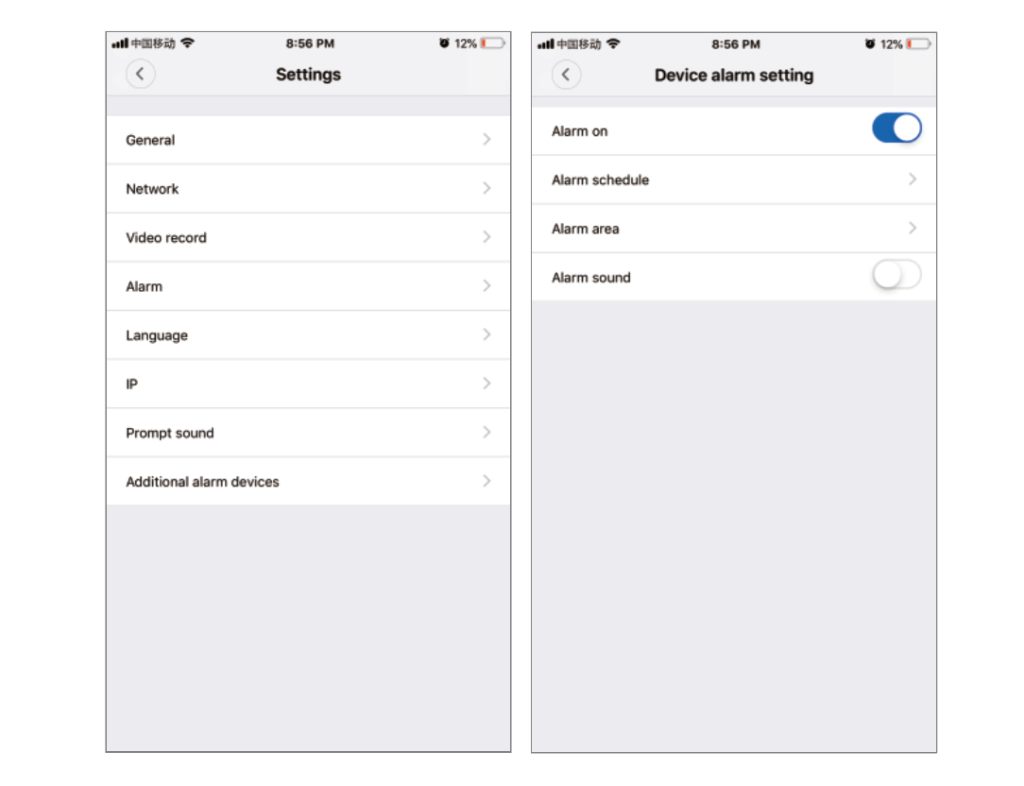
Alarm setting
When the camera detects a moving object, it sends a notification to the app.
Tap “Settings” and then tap “Alarm” to enable it.
Rebroadcast
Enter the preview screen, click “Playback”, you can select SD card or cloud recording, select the date to find the recording on a specific date.

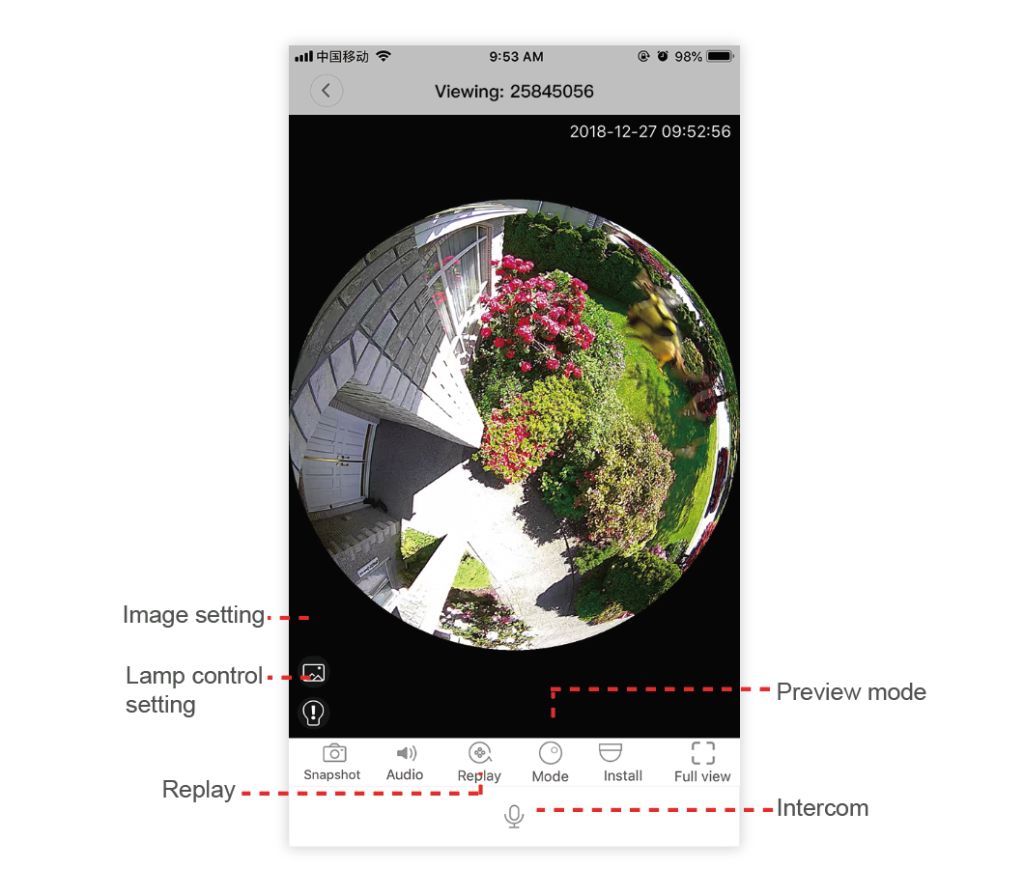
Preview
The following is a preview of the featured introductory images, click the play button to start the preview.